Category Archives: Auto Repair

Does my car need Idle Relearn? What is throttle body relearn?

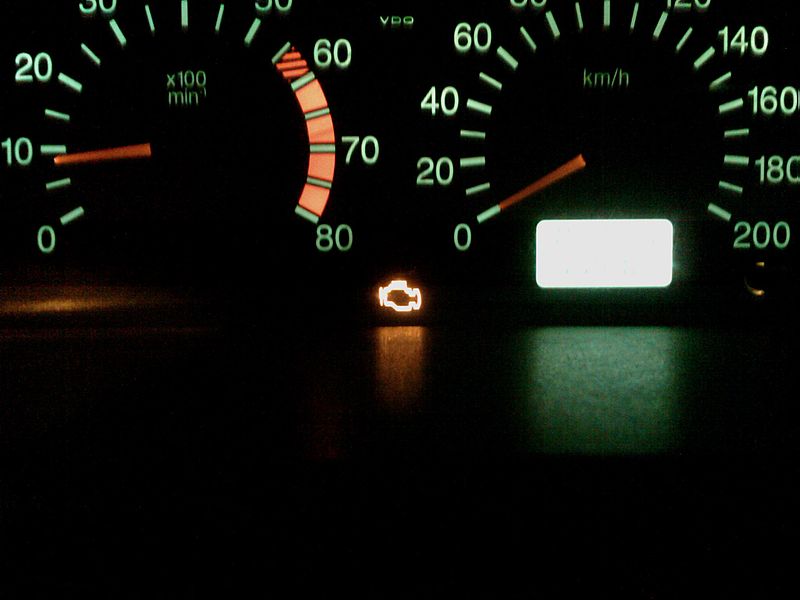
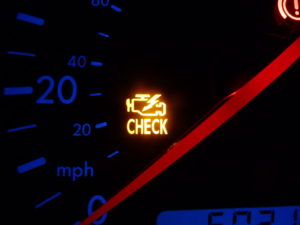
Idle Relearn (aka throttle body relearn) is the procedure that is required to obtain the correct idle speed after replacing electronic throttle body, disconnecting a battery cable, clearing a check engine light, etc. The symptoms are, idle is too low, too high, or erratic. Sometimes the engine stalls when you stop at the traffic light. And you may see the check engine light come on with the idle speed related trouble codes.

image of electronic throttle body

Why does Idle Relearn need?

Many newer vehicles use an electronic throttle body which contains a throttle plate, motor, and sensors. They are responsible for regulating all air flow into the engine, including the air flow for maintaining idle speed. When idling, the vehicles computer sends a signal to the throttle body and controls the throttle plate to adjust the idle speed depending on the engine temperature and whether AC is on or off. When the computer loses the connection to the throttle body, it loses the position of the throttle plate. Thus, the vehicle computer needs to relearn the throttle plate after losing connection to it.

When is Idle Relearn required?

As mentioned above, Idle Relearn is required when the vehicle computer loses the connection to a throttle body. And, many things cause it to happen.

image of vehicle battery
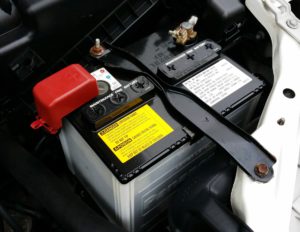
  • Disconnecting a battery cable
  • A battery dies
  • Replacing a battery
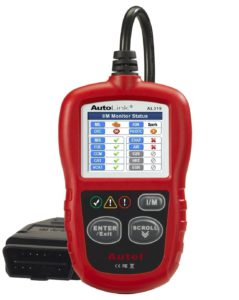
  • Clearing the check engine light
  • Replace an electronic throttle body
  • Cleaning an electronic throttle body in an inappropriate way
  • etc…

Please note that it doesn’t mean that you will need the idle relearn after these repairs or incidents. It totally depends on models of vehicles.

Read Also: How to clean the Throttle Body?

Does my car need Idle Relearn?

In general, the procedure of idle relearn is necessary on vehicles with electronic throttle body (=ETB aka DBW Drive-By-Wire).

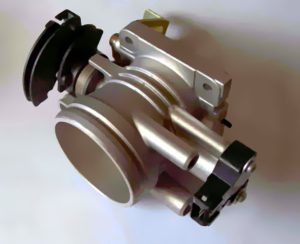
How does Electronic Throttle Body work?

Vehicles with ETB don’t have a physical cable connected between a throttle body and accelerator pedal. It’s fully controlled by electricity. There is a sensor attached to accelerator pedal that tells the vehicle computer how deeply you press the pedal. And, the computer sends a signal to a motor inside ETB and make the throttle plate open or close. When idling, the computer sends a signal to open the throttle plate slightly, so the engine keeps running without stalling.

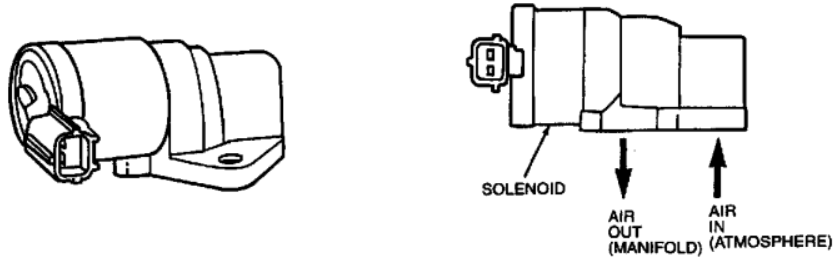
How does a conventional throttle body work?

image of throttle body

A conventional throttle body is simple. When you press an accelerator pedal, a cable that physically connects the accelerator pedal with throttle body pulls and turn to open the throttle plate. When you release, a spring turns back and closes the throttle plate. So, a conventional throttle body has another device to control the idle speed. It’s called the Idle Air Control Valve (IAC valve). The IAC valve is fitted over the throttle body, and it bypasses an air over the throttle plate. The computer sends a signal to the IAC valve and controls the air flow to maintain the idle speed. IAC valves need a procedure to initialize, too. The procedures are a lot simpler, though. For examples, leaving the key on for a few minutes or letting it idle without any load for several minutes.

image of idle air control valve ford

The point is that ETB is a much more complicated component than conventional throttle body. IAC valve is just an electric motor and used only for adjusting the idle speed. ETB, on the other hand, is responsible for not only maintaining the idle speed but also responding to the accelerator pedal. It communicates with the computer all the time. Thus a set of procedure to have the computer relearn is necessary after a certain repair or disconnecting a battery, etc.

How can you get the procedure of idle relearn?

Unfortunately, not all repair manuals have the information about idle relearn. And you may or may not find it in the owner’s manuals. So where can you find it? Go online, search “idle relearn + make, model, and year of your vehicle,” and you may get results. If not, search “idle relearn + make” only. The procedure may be the same among all vehicles from the same manufacturer.

List of Idle Relearn Procedures

Where can you get Free Check Engine Light Diagnosis?

Check Engine is one of the indicator lights in the instrument panel and also a part of On-Board Diagnostic system aka OBDII. When there is something wrong in the engine or emission system, the vehicles computer turns on the Check Engine Light to notify the driver. At the same time, the vehicle computer stores the code(s). You can see the codes by scanning the vehicle computer with a scan tool (also called a scanner or code reader.) Scanning the computer is the first step of check engine light diagnosis. And you can get free check engine light diagnosis in some ways

image of check engine light

Auto Parts Stores

Here is a list of auto parts stores that offer a free computer scan and tell you the codes. These are not all stores but my local stores I verified.

  • Advance Auto Parts
  • AutoZone
  • Napa Auto Parts
  • O’Reilly Auto Parts
  • Pep Boys Auto Parts

The reason why they do it for free is that it’s not technical job. What they do is to plug a scanner into an OBD port and press a few buttons, and they get the codes.

But still, why do they do that for free?

First of all, they are not repair shops but parts stores. I guess they are hoping you to buy the parts at their stores to fix the check engine light problems for yourself. They may even mention the common causes of the problems of the specific code. For example, the code P0136 is O2 Sensor Circuit Malfunction Bank 1 Sensor 2. A store clerk may mention that a bad oxygen sensor can be the cause. Sometimes, it’s true, but not always. Keep in mind that you can’t assume the cause of the problem without further diagnosis.

Local Mechanic Garage

If you have a good relationship with your local mechanic, they may scan the computer for you for free. But that’s all they offer for free. Unlike parts stores, mechanic garages fix the problem. They are capable of identifying the cause of the problem with further diagnosis. This diagnosis incurs a fee for labor of at least an hour. So, if you go to a mechanic garage, tell them that all you need is to have the computer scanned, and make sure if they do that for free in advance.

Scan for yourself

It’s not exactly free because you have to buy a scan tool, but it’s recommended for a DIYer. The prices of scan tools range from $20 to thousands of dollars. You can get a decent one for around $50. Once you bought one, you can scan the computer as many times as you need. You can freely use other features like clearing the check engine light, I/M readiness monitor, live data, and so on. BlueDriver is one of the most popular scan tools. Unlike conventional scan tools, BlueDriver is a Bluetooth adapter that connects with your smartphone and works with the app. It has advanced features like enhanced diagnosis (ABS, SRS, TPMS, etc.), Mode 6, Repair Report, and so on. Click here to see the details of BlueDriver.

Conclusion

Scanning the computer and getting the codes are the first step of tackling with check engine light diagnosis. With the codes, you can look up the details, possible causes, and possible fixes on the internet. In the end, you may still have to go to a mechanic garage to fix the problem, but it’s good to have some insight about the problem beforehand. If they tell you something unrelated to your research, you should ask for more details about that. You also have an option to go to another mechanic garage for a second opinion.

Related Posts

Timing Belt Replacement Guide – read this if you DIY timing belt replacement

Timing belt is a significant role on vehicle’s engine. Unlike other belts such as serpentine, v-belt, and accessory belts, they are hidden by covers. It’s not necessary to check often. But you need to follow the recommendation of change interval on a repair manual. This post is timing belt replacement guide.

image of timing belt replacement

What is a timing belt?

A timing belt is driven by a crankshaft, and it rotates camshaft(s) in the proper sequence. The proper sequence is accomplished by aligning marks on the camshaft and crankshaft sprockets when you install a timing belt. This sequence allows the intake and exhaust valves to open and close at the exact timing along with the position of the piston.

How does a timing belt look?

image of timing belt

Timing belts are much wider than serpentine belts or v-belts. They are flat and thin, but they have teeth on one side. These teeth mesh with the sprockets of camshaft and crankshaft and rotate them all together without slipping.

When to replace a timing belt

You can find change interval of the timing belt on an owner’s manual or repair manual. It ranges from 60,000 to 105,000 miles. And a timing belt needs to be replaced when related components such as a water pump and oil pump need to be replaced. On many models, these components are driven by a timing belt, and a timing belt has to be removed when you replace these components. In this case, you have to replace a timing belt to a new one for two reasons. One of the reasons is that a lot of work has to be done to replace these components. The other reason is that a timing belt may be contaminated by water or oil and shortened its life.

What happens when a timing belt breaks

Image of bent valves

A pair of Poppet valves bent by collision with a piston after timing belt breakage at 4500 RPM

First of all, a broken timing belt can never start the engine. If a timing belt breaks when the engine is running, it may cause extensive damages to the engine. On some engine, intake valves have to be closed when pistons are at the top dead center. Otherwise, they can hit and damage each other. Whether your car has this type of engine or not, it’s wise to follow the change interval on a repair manual to avoid this incident as much as possible.

A time belt or a timing chain?

image of timing chain

Some cars use a timing chain instead of a belt. A timing chain usually doesn’t need to be replaced. If you are not sure which one your car uses, you see that in an owner’s manual or a repair manual. For your information, a cover of a timing chain is most likely metal and completely sealed. That’s because a timing chain has to lubricated by motor oil. A cover of a timing belt, on the other hand, is most likely plastic. And there is no need for sealing completely. You can even peek at a timing belt by removing a few bolts on the cover and making a room.

Tools for timing belt removal and installation

Depending on a car model, you may need special tools for timing belt removal and installation. For example, you may need a belt tension gauge, tensioner adjuster tool, crankshaft wrench tool, etc. This information is not on an owner’s manual but a repair manual. It’s important to know the tools you need and have them before starting a job.

Conclusion

Replacing a timing belt usually take you hours of work. Think about replacing other items because only accessing a timing belt requires a lot of works. For example, a water pump is driven by a timing belt on many car models. It highly recommends replacing a water pump as well when you replace a timing belt. Don’t forget about tools you may need for timing belt removal and installation. All the information has to be gathered from a repair manual before you start a job. This initial work will save you time in the end.

image of timing belt alignment marks

OBD Diagnostic Codes Explained

The check engine light comes on, and you can scan the vehicle’s computer and get OBD diagnostic codes. The codes don’t tell you which part is needed to replace. They just tell you that the symptom of the problem and you will need to diagnose further to determine the cause of the problem.

image of obd scan tools

The codes consist of one alphebet and 4-digit number. Without looking up the meaning of the code, you can tell some information from the alphebet and the first 2 digit.

The codes are categorized into four different types. B is for Body, C is for Chassis, P is for Powertrain, U is for Network. P-codes are responsible for check engine light. The P-codes starting with 0 are generic codes. They are standardized. It doesn’t matter which manufacturer. The code starting with 0 are the same meaning among any manufacturers. However, the P-codes starting with 1 are manufacturer specific codes or enhanced codes. These codes have a different meaning for each manufacturer. Some cheap code reader can pull out the codes but without descriptions. You will need to look up the meaning of the codes online or repair manuals.

The second digit of P-code tells you the following categories. You don’t have to memorize them, but it’s good to know that they are categorized into those systems.

  • 1 Fuel and Air Metering
  • 2 Fuel and Air Metering Injector Circuit
  • 3 Ignition System
  • 4 Emission Controls
  • 5 Vehicle Speed Controls and Idle Control
  • 6 Computer Output Circuit
  • 7 Transmission
  • 8 Transmission
image of bluedriver

Now you have a better idea of OBD diagnostic codes. You can tell which system is having the problem from the codes. Then you will have to diagnose further to narrow down the cause of the problem. An OBD scan tool called BlueDriver is a very popular OBD adapter. It is focused on vehicle diagnostics. You will get the detail of the codes and repair reports that contains possible causes and verified fixes. And it can scan enhanced codes including ABS, SRS, Transmission, TPMS, etc. With a good repair manual, you can tackle complicated OBD-related problems with confidence.

Read Also: What should you do when Check Engine Light comes on?

What should you do when Check Engine Light comes on?

Check Engine Light is a little amber light on the dashboard. Depending on models, it can be just the word Check, Check Engine, or Service Engine Soon, or the icon of a small picture of the engine, or the combination of the icon and the word. By illuminating Check Engine Light, the vehicle computer notifies the driver there is something problem with your car. Instead of just taking your car to a mechanic, let’s see what you should do when Check Engine Light comes on.

What is Check Engine Light?

Check Engine Light is a part of the Onboard Diagnostic system. When the vehicle computer detects abnormality from one or more of various sensors. It tells you that by illuminating Check Engine Light. At the same time, the computer stores a trouble code(s), which gives you a rough idea of the problem and where to start diagnosing.

Trouble Codes

Trouble codes are sets of one alphabet and a four-digit number. The alphabet shows which system of the vehicle a problem exists, and the four-digit number shows the details of the problem. P-codes are responsible for Check Engine Light to come on. P stands for Powertrain, which is the category including engine, transmission, and associated drivetrain.

What to do when Check Engine Light comes on

Most of the cases, Check Engine Light doesn’t mean that you have to pull over and stop the engine and call a tow truck. But, you need to pay attention and have your car diagnosed as soon as possible.

Some cases, however, you need to take your car to a repair shop right away. When Check Engine Light is flashing, the engine is misfiring. You probably notice the engine shaking and losing its power.

If you don’t notice any performance change and it illuminated all of a sudden, it’s worth checking a gas cap. Sometimes, a loose gas cap can be the cause of check engine light. Some vehicles even have a separate indicator light for the purpose. Let’s say it was actually loose, and you tightened it. Check Engine Light doesn’t go off right away. It requires several drive cycles to clear the light.

Scan, get the code

Now, it’s the most critical part. Ever time you have Check Engine Light on, you should scan and retrieve the code which triggered Check Engine Light to come on so you can look up the detail of the problem from the internet or repair manuals.

Some repair shop will scan the computer for free. You may want to stop by such repair shops and have a trouble code retrieve.

Scanning the computer and retrieve the codes are not a technical job. Anyone can do it. If you want to do it for yourself, you can have your own scan tool. A pocket-size code reader costs $20 to $50, and you can store it in the glove compartment. Some other favorite items are OBD adapters. They are just adapters to be plugged into an OBD port and connected to your smartphone wirelessly. Then, you navigate with smartphone’s app. These adapters cost $20 to $100.

Conclusion

Check Engine Light doesn’t mean that you have to pull over immediately and call a tow truck. But, you need to know what code triggered the light to come on. Even if you don’t know much about a car, it’s important to retrieve the code and take a memo of it so you can look up the details or ask someone else for advice. Whether you fix the problem or ask a mechanic to fix, it’s good to have your own scan tool always in a glove compartment.

Read Also: OBD Diagnostic Codes Explained

Automatic Transmission Won’t Shift Until 4000 RPM

Does improper cooling system cause transmission shifting problem? My 2000 VW Jetta VR6 automatic transmission won’t shift until an engine speed reaches around 4000 rpm. It first happened on the way to work. It is just around 10 miles away and usually takes less than 20 minutes. But on that day, there was a heavy traffic and took more than an hour to get to the work place. When I almost got there, I noticed a transmission wouldn’t shift from 1st to 2nd.  Because I had just bought the car and I didn’t know any repair history, I assumed that transmission fluid was the cause and time to change. I replaced the fluid with a new filter without thinking or checking any further. Contrary to expectation, the old fluid looked very clean and didn’t have much metal flakes.

Luckily, it didn’t happen on the way back home. But soon, it started happening again. It didn’t happen all the time, but it happened after driving in traffic for a long time, and especially on a hot weather. So I suspected a bad transmission cooler.

This makes sense of the occasional problem only when hot. This time, however, I checked a little more. I used an obd scan tool to see if a temp was really high so I could make sure that transmission cooler was bad. At a glance of obd data, I couldn’t help noticing that a coolant temperature was high. I checked this in the middle of winter, but it stayed between 204.8 and 217.4 degree Fahrenheit (96 and 103 degree Celsius), although temp gauge in the dash board pointed to 190. A cooling fan didn’t start until a temp got over 212 (at a low speed). According to ALLDATA, the fan is supposed to start at high speed when temp is between 210.2 (99) and 221 (105). The temp range of low speed is between 197.6 (92) and 206.6 (97).

I believed this had to be corrected first whether the transmission cooler was bad or not. I changed a thermostat, a fan switch, and a temp sensor, but it was the same. Then, I changed a fan control module and a water pump, but it was also the same. Temp stayed high, and the transmission wouldn’t shift until it reached over 4000 rpm.

Because a radiator looked absolutely new, I didn’t change one. Almost all component of cooling system was new now. If I jumped the terminal of a fan switch connector, it made the fan start at both low and high speed. When looking for the solution online, I found a low temp thermostat and fan switch.

DSCN3594

no triangle switch

low temp thermo switch 75-82

square only

DSCN3607

needed to convert

There are several thermostats that open at different temperature, and I chose 176 (The standard is probably 190). As for a fan switch, it was kind of hard to find. I don’t remember how, but I manage to find it here. I bought 167/180 (75/82), and the standard one is probably 203/216 (95/102). (In this store, they have much lower temp thermostat, 158, called Ultra Low Racing Thermostat and triangle-to-square connector harness, too)

After I changed them, coolant temp is between 195.8 (91) and 204.8 (96). Temp is still higher than it is supposed to be, but my car drives well now. The shifting problem hasn’t happened so far. The time I changed these is in March, but it is still cold weather here. I don’t know what is going to happen in summer. If it does, I may need to change transmission cooler or install aftermarket cooling fan and an adjustable controller.

These tools were very helpful!!!

bluetooth obd adapterKD Tools 41720

How to Replace Audi VW Rear Brake Pads w/electric parking brake

Some new Audi and Volkswagen vehicles need a special type of an electric device to change rear brake pads. Without this, you cannot push a piston back into the caliper. Those vehicles use electric motors and module to set or release the parking brake. After deactivating electric parking brake, you have to push the pistons back into calipers manually, then replace brake pads. After putting back the calipers, electric parking brake have to be reactivated. Since electric parking brake module is very sensitive to low battery voltage and the power is needed to operate an electric parking brake, you had better connect a charger to the battery during the job.

The software in this video is called VCDS (VAG-COM Diagnostic System). It is very useful diagnostic software for Audi and Volkswagen vehicles. It can access to all vehicle systems such as, Engine, ABS, Airbag, Radio, Climate Control, etc… The software needs a cable that connects vehicle control modules with Windows PC via OBD port. For more information about VCDS, click here.

The important thing is that you should know the whole procedure to change the rear brake of these vehicle. Since the system is still new technology, many people don’t know about this process. Maybe, most technicians or home mechanics try to push back the piston in a regular way. However, after a few attempts, they should stop doing and try to look for some information. It is always important to refer to the manuals or internet whenever you doubt or notice something unusual.


GM Fuel Pump Wiring Diagram

This is a story from my personal experience as an auto mechanic. I worked on 1996 Chevy Tahoe V8 5.7L. The owner of the car complained that the car was hard to start after he parked for a while. Once it started, it drove fine and never had problems such as the engine stalls and shakes. After the engine shuts off, it could start right back if the car did not sit for more than 5 minutes.

First, I suspected a fuel leak. 5 minutes are enough time to lose the pressure in the fuel system if there is a leak. I thought there was too small leak to affect the engine performance. I thoroughly checked by leaving the car on the lift for more than an hour, but I could not find any leak. I scratched this possible cause from the list.

My next target was a fuel pump: the pump delivers fuel and creates fuel pressure. I thought the fuel pump did not work hard and fast enough. I installed a fuel gauge and measure the fuel pressure, and that was it! The pump built up the pressure just before and after the engine started. When there was no pressure, the engine would not start. That forced me to think of a leak, but I had not found anything earlier, and I soon noticed that the pump was not working when experiencing the problem.

At that time, I found it a little odd. Because the symptom indicated a physical problem like a leak, but it is an electrical problem. I came up with some things, but none of them accounted for all the symptoms. Time was up. I told the customer to come back tomorrow, got off work. As far as I know, the customer never came back to the shop. The problem was not solved until I happened to see a wiring diagram of the same car.

That was a long time ago. I was a newbie as an auto mechanic, and the shop I worked for never had auto repair manuals or wiring diagrams. If I go back to the past and the same situation, I would go straight to the library and try to look for a repair manual instead of wait for more than 5 minutes every time I tried to locate the problem. There would have been enough time to fix the problem and give the car back to the customer on the same day.

Looking up wiring diagrams is a short cut for finding the cause of problems. Reading repair manuals before you start a job saves your time. This is one of my experiences that remind me how important auto repair manuals are.

In case you wonder what was the cause of the problem on Chevy Tahoe, look at the diagram.

1996 Chevy Tahoe GM Fuel Pump Wiring Diagram

A relay for fuel pump was bad whole time. On older GM vehicles, an engine oil pressure switch is giving power to a fuel pump while the engine is running. ECM sends a signal to the relay at the item of only start-up.

How To Do It Yourself Auto Repair

You should know how to fix your car before you start a job. Otherwise, you will waste your time by opening up some other parts that are not related with the problem or going to a parts store to buy extra parts and tools. Preparing for everything lets you save your time and fix your car easily. Let’s see more details how to do it yourself auto repair.

There are auto repair manuals because you can look up not only when you get lost in the middle of the job, but also before you start the job. You can get the outline of each job, tools you need for a repair, or you can tell how long it normally takes to finish a job so you choose the best time to do it without a rush.

Repair manuals tell you whether you need to use a jack and crawl under the car. This helps you decide where to repair your car. You do not want to do this kind of jobs on a dirty ground. Even if the ground is clean but dangerous to use a jack for some reasons such as it is not level, or there is no room to place a jack when you work in your tiny garage, you will have to change the work place. Imagine all procedures of the job you are going to do and you can pick the best place and position for the job.

As for tools, you should own a basic mechanic tool set for any kinds of job. Buying a set is much cheaper than buying items one by one. You should own a basic size range of sockets and wrenches, 1/4, 3/8, and 1/2 ratchets and extensions, pliers and screwdrivers, and so on. You will buy the other tools individually when you need them.

To do auto repair, you need not only tools ,but also some equipment sometimes. If a job is a water pump replacement or a radiator change, you do not forget about a container to catch anti-freeze: however, there are many repairs that require to disconnect coolant hoses and drain anti-freeze. Whether you work on a street or in your home garage, you should not mess up the ground.

As you see, looking up information in auto repair manuals in advance have many benefits. You can save your time, perform a job smoothly without hassles, and keep your work place clean so that you will contribute to protect the environment.